 The first multimedia tool I would suggest is the Video Scale Series. You cannot go wrong with this tool.
With these videos you can watch me play each open string scale presented in Uncle Tim's First Year.
This is important because when you see it, you can easily learn why the finger strategies are so important.
You can see the tiny nuances of changing strings. Every string is a little different than the others and there are many different ways of moving across them .
Videos reveal all the small undocumented moves.
Each of the twelve diatonic scales will be broken down frame by frame so each and every movement is presented with accuracy and detailed pictures.
 Uncle Tim's proven finger strategy is fully explained with videos of each scale. You can play the video as many times as you want and the complete explanation explains the process completely. This is a great practice aid.
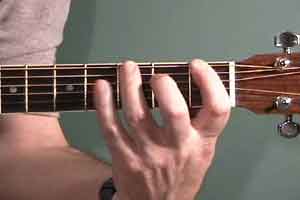
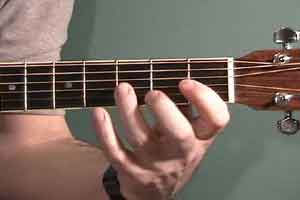
You can see exact hand positions, palm adjustments, thumb placement, and the exact parts of each finger that actually hits the string. Nothing is left out.
Each picture is 640 x 480 pixels. For comparrison, the picture here is 300 x 200 pixels.
All keys have between 15 and 23 pictures, with full descriptions, finger strategies and diagrams showing exactly what notes are being played.
 This is an excellent companion to Uncle Tim's First Year and guarantees you will have every opportunity to play scales quickly, correctly and translate that into becoming a better guitar player faster. No matter what kind of music you are interested, they all start with these scales. Once you understand them, you can go in whatever direction you want with ease.
Uncle Tim's Video Scales are delivered at the time of purchase. They are accessible through a special area on one of our web sites. You can print out the lesson and listen to the video anytime.
Playing guitar is all about movement and the video series captures hand movement and proper technique completely.
![]() Flash Scales $19.95
Flash Scales $19.95
![]() Uncle Tim's Flash Chords $19.95
Uncle Tim's Flash Chords $19.95
![]() Uncle Tim's Flash Scales And Chords $29.95
Uncle Tim's Flash Scales And Chords $29.95
![]() Uncle Tim's Video Series $19.95
Uncle Tim's Video Series $19.95
![]() Uncle Tim's Flash Scales, Chord and Video Series $44.95
Uncle Tim's Flash Scales, Chord and Video Series $44.95
Home | FAQ | Purchase | UTFY | UTBB | UTBC | Tools | Flash Scales | Flash Chords | Video Scales | Newsletter | Reader Comments | About Us | Guitar Lessons | Teaching Center | eBooks | String a Guitar | Quick Guides | Search | Contact | Privacy Policy | Guarantee | Links | Login | Help Desk | Site Map
